Deploying a HA Kubernetes cluster on Raspberry Pi using Kubeadm

I have been working on Kubernetes at work for a little less than a year but my job mostly involved setting up a managed cluster by a cloud provider and deploying applications and tools on said clusters. I hadn't had the opportunity to set up a cluster by myself. But, I always wanted to setup a bare metal cluster one day.
Why bare metal, you say? Well, using VMs to set up a cluster didn't seem right as a lot of the networking would still be managed. I wanted to get my hands dirty with the difficult bits. This is where the Raspberry Pis come in. I had been eyeing to buy some pis to do a project for sometime but never got around it and this seemed like the perfect opportunity.
Getting Started
Hardware needed
- Raspberry Pi 4B 8GB - 6 units - note 1
- Power adapters for Raspberry Pis - 6 units - note 2
- Unmanaged switch with minimum 7 ports - note 3
- Ethernet cables - 6 units - note 4
- Ethernet cable - 1 unit - note 5
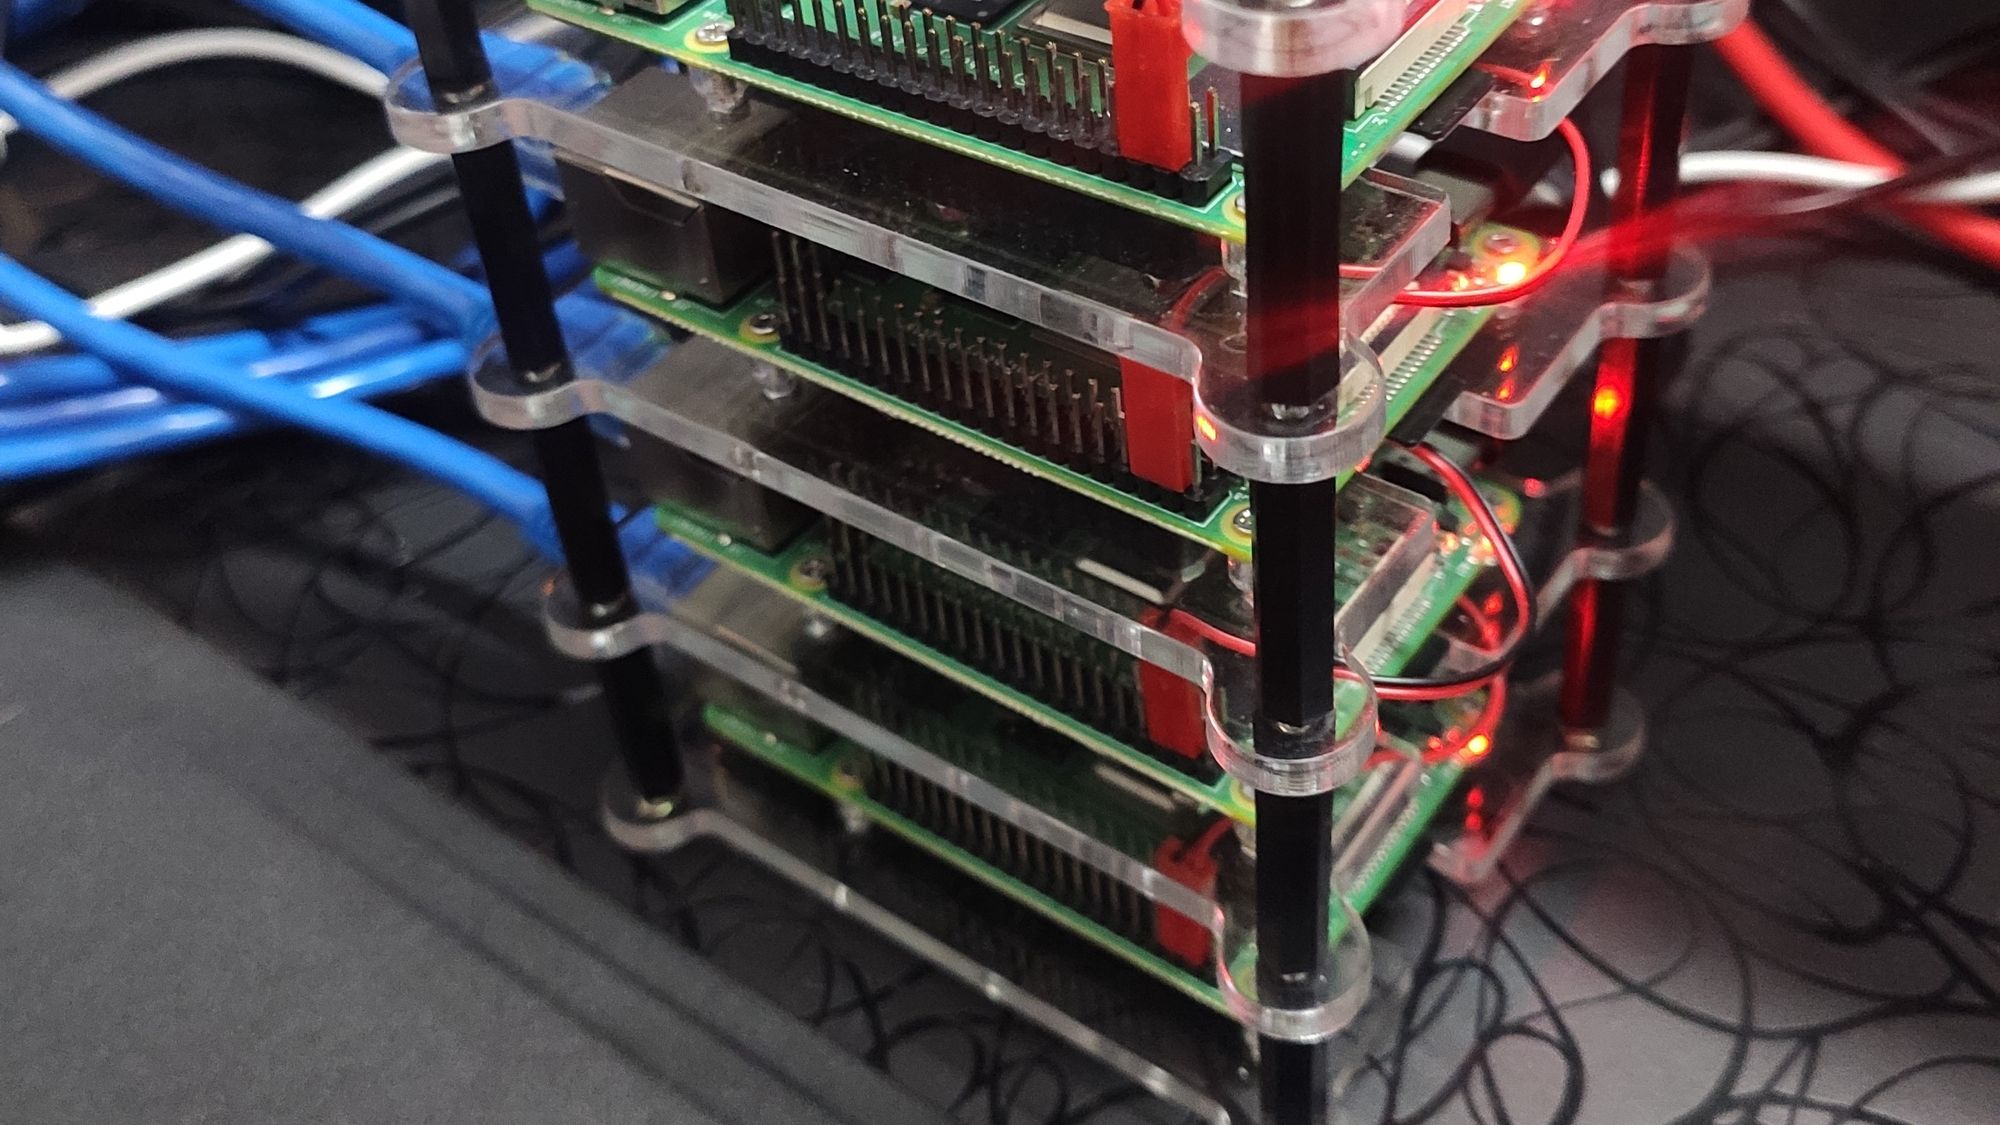
- 6 layer Raspberry Pi rack - note 6
- 32 GB microSD cards - 6 units
- Keyboard - note 7
- Monitor - note 7
- HDMI to micro HDMI cable - note 7
- PC with microSD slot or microSD adapter
Software needed
- Raspberry Pi Imager - https://www.raspberrypi.com/software/
- Windows Susbsystem for Linux (WSL2) - note 8
- Ubuntu 20.04.3-raspberry pi distribution - note 9
Notes regarding the above requirements
1. You can use models with 4GB of RAM too but anything below that is cutting it close.
2. You can instead use a 6 port USB power supply but ensure that it can provide a minimum of 91.8W. You will also need 6 units of USB cables with Type-C port for the Raspberry Pi side.
3. You can also use a managed switch but I can't guarantee the below steps will work.
4. Try to get short cables to have a compact solutions.
5. This cable will connect your router to the switch so get a size that works for you.
6. Or use multiple cases or keep them lying on the desk, doesn't really matter but having a cluster case can make the setup very compact.
7. You might not need to connect your Pi with a keyboard and monitor if you can directly SSH into it at first boot. You would need to have a PC anyway.
8. Not really needed if your primary system is not Windows, or if you are comfortable using ssh in Windows or want to use a better terminal.
9. Not needed to be downloaded manually.
Setup
The 6 Raspberry Pis will be used for creating 3 control plane nodes and 3 worker nodes. All of them will be running Ubuntu 20.04.3 and will be using containerd as the container runtime. We will be using Kubeadm to install Kubernetes in a Highly Available, stacked etcd topology.
Initialise microSD cards
First, we will need to setup our microSD cards. For this, we will use the Raspberry PI Imager and we will install Ubuntu 20.04.3 on all our microSD cards.
Insert each microSD card into your computer's card reader and do the following for each card.
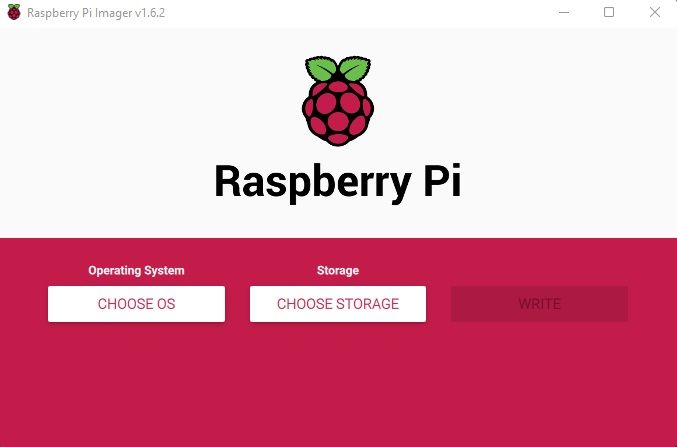
Open the Raspberry Pi Imager software and click the CHOOSE OS button.
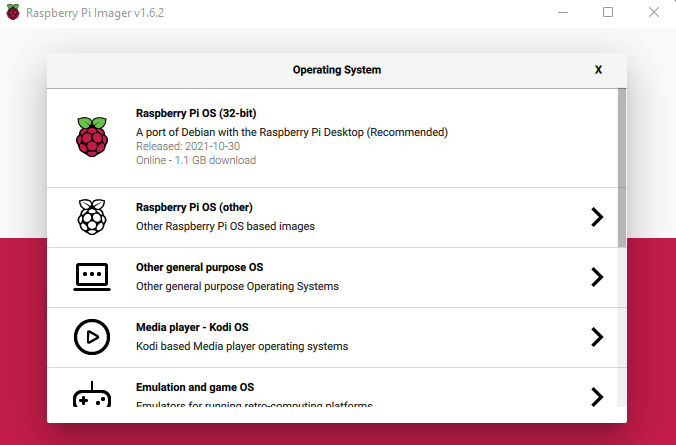
Then in the list, click on Other General Purpose OS.
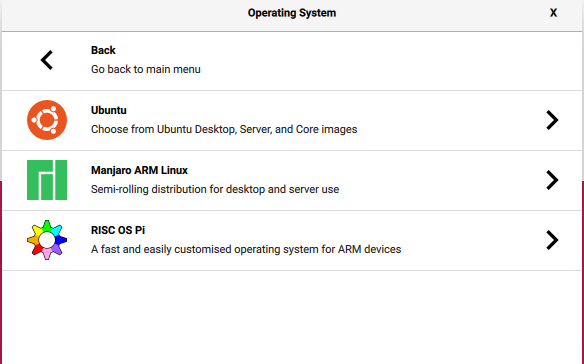
Select Ubuntu in the next screen.
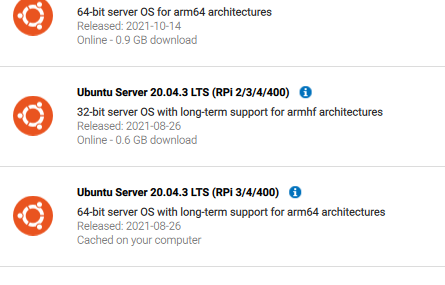
Then select Ubuntu Server 20.04.3 LTS (RPI 3/4/400). Ensure that you are selecting the one marked 64-bit and support for arm64 architecture.
Then click on CHOOSE SD CARD. A window should popup listing in the removable drives inserted. Carefully choose the drive which maps to your microSD card. Then click on WRITE. Once the writing is completed, you can eject the microSD card and proceed with writing the next card.
F: in my case) and edit the file usercfg.txt (so, in my case that would be F:\usercfg.txt). This file can also be changed from the OS itself. It's located at /boot/firmware/usercfg.txt. Ensure that it's as follow:# Place "config.txt" changes (dtparam, dtoverlay, disable_overscan, etc.) in
# this file. Please refer to the README file for a description of the various
# configuration files on the boot partition.
hdmi_force_hotplug=1
hdmi_group=2
hdmi_mode=82
usercfg.txt
The values for hdmi_group and hdmi_mode might differ based on your needs. If you are connecting a monitor, use hdmi_group=2. If you are connecting a TV instead, use hdmi_group=1. To find out the hdmi_mode for yourself, check https://www.raspberrypi.com/documentation/computers/config_txt.html#hdmi_mode
When you have written all the cards you can pop them in into each of your Pis. Don't power on the Pis as of yet. Connect the Pis to the switch using the ethernet cables and ensure that the switch is connected to the router. Then, turn on each Pi and proceed with the Network setup.
Network Setup
Once the Pis are turned on, connect the monitor and keyboard to each Pi in turn and proceed as follows:
-
Change the hostname by
sudo hostnamectl set-hostname clstr-01-cp-01. This will change the file/etc/hostnameto add the hostname to it.
Thehostnamefile only keeps track of the system hostname and should not be a FQDN. -
Open
/etc/hostsand add the following:127.0.1.1 clstr-01-cp-01 clstr-01-cp-01.sayakm.meSo the complete file looks like
127.0.0.1 localhost
127.0.1.1 clstr-01-cp-01 clstr-01-cp-01.sayakm.me

# The following lines are desirable for IPV6 capable hosts
::1 ip6-localhost ip6-loopback
fe00::0 ip6-localnet
ff00:0 ip6-mcastprefix
ff02::1 ip6-allnodes
ff02::2 ip6-allrouters
ff02::3 ip6-allhosts
This will ensure that calling by the hostname or the FQDN from within the system will loopback.
-
The next files to be changed will be done using
netplan. This tool updates theresolv.confvia a symlink so DON'T updateresolv.conf. Moreover,dhcpcd.confdoesn't exist in Ubuntu so DHCP config needs to be changed fromnetplanwhich updates/run/systemd/networkso that it is flushed and recreated at boot. So,/etc/systemd/network/doesn't have anything. To configurenetplan, create a new file/etc/netplan/60-static-ip.yaml. This will override the existing file that we don't want to change. Add the following to the filenetwork: version: 2 ethernets: eth0: dhcp4: no addresses: [192.168.0.50/24] gateway4: 192.168.0.1 nameservers: addresses: [8.8.8.8,8.8.4.4,1.1.1.1,1.0.0.1]The above turns off DHCP. That means we need to manually configure what gateway and nameservers to use, as this was earlier provided by the DHCP server. The
addressesclause is not only setting the static IP but also setting the subnet mask. Thegatewayis taken from the router properties. Thenameserversare from Google and Cloudflare. Finally dosudo netplan applyto commit these changes. -
Finally we will update the
etc/hostsfile so that the FQDNs are resolved properly when called from cluster to cluster. Add the following to the file in each cluster192.168.0.50 clstr-01-cp-01 clstr-01-cp-01.sayakm.me 192.168.0.51 clstr-01-cp-02 clstr-01-cp-02.sayakm.me 192.168.0.52 clstr-01-cp-03 clstr-01-cp-03.sayakm.me 192.168.0.100 clstr-01-nd-01 clstr-01-cp-01.sayakm.me 192.168.0.101 clstr-01-nd-02 clstr-01-cp-02.sayakm.me 192.168.0.102 clstr-01-nd-03 clstr-01-cp-03.sayakm.meso that the file finally looks like this
127.0.0.1 localhost 127.0.1.1 clstr-01-cp-01 clstr-01-cp-01.sayakm.me # The following lines are desirable for IPv6 capable hosts ::1 ip6-localhost ip6-loopback fe00::0 ip6-localnet ff00::0 ip6-mcastprefix ff02::1 ip6-allnodes ff02::2 ip6-allrouters ff02::3 ip6-allhosts 192.168.0.50 clstr-01-cp-01 clstr-01-cp-01.sayakm.me 192.168.0.51 clstr-01-cp-02 clstr-01-cp-02.sayakm.me 192.168.0.52 clstr-01-cp-03 clstr-01-cp-03.sayakm.me 192.168.0.100 clstr-01-nd-01 clstr-01-cp-01.sayakm.me 192.168.0.101 clstr-01-nd-02 clstr-01-cp-02.sayakm.me 192.168.0.102 clstr-01-nd-03 clstr-01-cp-03.sayakm.me -
Now we start installing k8s related stuff. Start with
containerdCRE. Runsudo apt-get update sudo apt-get install containerdNext, we have to initialise the default config if not present. Check if the folder
/etc/containerdexists. If not, create it.sudo mkdir -p /etc/containerdThen create the
config.tomlfile.containerd config default | sudo tee /etc/containerd/config.tomlNext, we need to use
systemdcgroup driver in the config file withrunc. Update the aboveconfig.tomlfile with[plugins."io.containerd.grpc.v1.cri".containerd.runtimes.runc] ... [plugins."io.containerd.grpc.v1.cri".containerd.runtimes.runc.options] SystemdCgroup = trueThe restart the
containerdservice.sudo systemctl restart containerd -
We need to load some networking modules for iptables to work. Load the
br_netfiltermodule.sudo modprobe br_netfilterWe also need to ensure that this module is alwasys loaded on boot. So add it to a file in the
modules-load.dfolder.cat <<EOF | sudo tee /etc/modules-load.d/k8s.conf overlay br_netfilter EOFThen to ensure that the node iptables correctly see bridged traffic, we need to add the following to the
/etc/sysctl.d/k8s.conf. Also reload sysctl.cat <<EOF | sudo tee /etc/sysctl.d/k8s.conf net.bridge.bridge-nf-call-ip6tables = 1 net.ipv4.ip_forward = 1 net.bridge.bridge-nf-call-iptables = 1 EOF sudo sysctl --systemRestart the
containerdserver.sudo systemctl restart containerd -
Now we are ghoing to install kubernetes and related packages. Start by
updating the packages and installingapt-transport-httpsandcurl. Then add the GPG key of the repo.sudo apt-get update sudo apt-get install -y apt-transport-https ca-certificates curl sudo curl -fsSLo /usr/share/keyrings/kubernetes-archive-keyring.gpg https://packages.cloud.google.com/apt/doc/apt-key.gpgThen add the Kubernetes
aptrepository. This repo still doesn't have a folder newer thanxenial.echo "deb [signed-by=/usr/share/keyrings/kubernetes-archive-keyring.gpg] https://apt.kubernetes.io/ kubernetes-xenial main" | sudo tee /etc/apt/sources.list.d/kubernetes.listThen install
kubelet,kubeadm, andkubectland pin their versions.sudo apt-get update sudo apt-get install kubelet kubeadm kubectl sudo apt-mark hold kubelet kubeadm kubectlThe last command is used to ensure that upgrades don't change their versions.
-
It is also important to have swap disabled permanently. It is already disabled if you have 8GB RAM during installation. If it's not disabled, disable it using the following
sudo sed -i '/ swap / s/^\(.*\)$/#\1/g' /etc/fstab sudo swapoff -a -
Next we need to ensure if the memory cgroups are enabled. To check, use
cat /proc/cgroupsand see of the value ofenabledformemoryis1or not. If not, we have to edit the file/boot/firmware/cmdline.txtand add the following to the end of the linecgroup_enable=memoryThen reboot the system. After the reboot, check again if the value of
enabledformemoryis1or not. -
(FIRST MASTER ONLY) The next steps include setting the system up for a Highly Available Control Plane. This neccesitates the presence of a Load Balancer and in this case we are going to use a software best Load Balancer called
kube-vip. To installkube-vip, first we need to create a config file which will be used to convert it into a manifest which will be use bykubeadmwhile initialising to create a static pod ofkube-vip. Start by pulling the image ofkube-vipand creating an alias to run the container.sudo ctr images pull ghcr.io/kube-vip/kube-vip:v0.4.0 alias kube-vip="sudo ctr run --rm --net-host ghcr.io/kube-vip/kube-vip:v0.4.0 vip /kube-vip"You can optionally permanently store the above alias in the
~/.bash_aliases.echo alias kube-vip=\"sudo ctr run --rm --net-host ghcr.io/kube-vip/kube-vip:v0.4.0 vip /kube-vip\" | tee -a ~/.bash_aliases . ~/.bashrc -
(FIRST MASTER ONLY) Next generate the manifest for the static pod. We are turning on HA for the control plane, and load balancers for both the control plane and the worker nodes.
kube-vip manifest pod \ --interface eth0 \ --vip 192.168.0.150 \ --controlplane \ --services \ --arp \ --leaderElection \ --enableLoadBalancer | sudo tee /etc/kubernetes/manifests/kube-vip.yaml -
(FIRST MASTER ONLY) Finally, we initialise the cluster using
kubeadm init. We need to ensure that the installed kubernetes version is the same as kubeadm. So, first doKUBE_VERSION=$(sudo kubeadm version -o short)Then, initialise the cluster
sudo kubeadm init --control-plane-endpoint "192.168.0.150:6443" --upload-certs --kubernetes-version=$KUBE_VERSION --pod-network-cidr=10.244.0.0/16--control-plane-endpointis the IP address of the load balancer as set earlier inkube-vip.--upload-certsis used to upload the certificates to the kubernetes cluster automatically without us needing to supply them.--kubernetes-versionis the version of kubernetes that you are using so that newer versions are not automatically used.--pod-network-cidris the CIDR block for the pod network. This is necessary for Flannel to work.The output should look something like this:
[init] Using Kubernetes version: v1.22.2
[preflight] Running pre-flight checks
        [WARNING SystemVerification]: missing optional cgroups: hugetlb
[preflight] Pulling images required for setting up a Kubernetes cluster
[preflight] This might take a minute or two, depending on the speed of your internet connection
[preflight] You can also perform this action in beforehand using 'kubeadm config images pull'
[certs] Using certificateDir folder "/etc/kubernetes/pki"
[certs] Generating "ca" certificate and key
[certs] Generating "apiserver" certificate and key
[certs] apiserver serving cert is signed for DNS names [clstr-01-cp-01 kubernetes kubernetes.default kubernetes.default.svc kubernetes.default.svc.cluster.local] and IPs [10.96.0.1 192.168.0.50 192.168.0.150]
[certs] Generating "apiserver-kubelet-client" certificate and key
[certs] Generating "front-proxy-ca" certificate and key
[certs] Generating "front-proxy-client" certificate and key
[certs] Generating "etcd/ca" certificate and key
[certs] Generating "etcd/server" certificate and key
[certs] etcd/server serving cert is signed for DNS names [clstr-01-cp-01 localhost] and IPs [192.168.0.50 127.0.0.1 ::1]
[certs] Generating "etcd/peer" certificate and key
[certs] etcd/peer serving cert is signed for DNS names [clstr-01-cp-01 localhost] and IPs [192.168.0.50 127.0.0.1 ::1]
[certs] Generating "etcd/healthcheck-client" certificate and key
[certs] Generating "apiserver-etcd-client" certificate and key
[certs] Generating "sa" key and public key
[kubeconfig] Using kubeconfig folder "/etc/kubernetes"
[kubeconfig] Writing "admin.conf" kubeconfig file
[kubeconfig] Writing "kubelet.conf" kubeconfig file
[kubeconfig] Writing "controller-manager.conf" kubeconfig file
[kubeconfig] Writing "scheduler.conf" kubeconfig file
[kubelet-start] Writing kubelet environment file with flags to file "/var/lib/kubelet/kubeadm-flags.env"
[kubelet-start] Writing kubelet configuration to file "/var/lib/kubelet/config.yaml"
[kubelet-start] Starting the kubelet
[control-plane] Using manifest folder "/etc/kubernetes/manifests"
[control-plane] Creating static Pod manifest for "kube-apiserver"
[control-plane] Creating static Pod manifest for "kube-controller-manager"
[control-plane] Creating static Pod manifest for "kube-scheduler"
[etcd] Creating static Pod manifest for local etcd in "/etc/kubernetes/manifests"
[wait-control-plane] Waiting for the kubelet to boot up the control plane as static Pods from directory "/etc/kubernetes/manifests". This can take up to 4m0s
[apiclient] All control plane components are healthy after 29.562791 seconds
[upload-config] Storing the configuration used in ConfigMap "kubeadm-config" in the "kube-system" Namespace
[kubelet] Creating a ConfigMap "kubelet-config-1.22" in namespace kube-system with the configuration for the kubelets in the cluster
[upload-certs] Storing the certificates in Secret "kubeadm-certs" in the "kube-system" Namespace
[upload-certs] Using certificate key:
feb5064c88b7e3a154b5deb1d6fb379036e7a4b76862fcf08c742db7031624d9
[mark-control-plane] Marking the node clstr-01-cp-01 as control-plane by adding the labels: [node-role.kubernetes.io/master(deprecated) node-role.kubernetes.io/control-plane node.kubernetes.io/exclude-from-external-load-balancers]
[mark-control-plane] Marking the node clstr-01-cp-01 as control-plane by adding the taints [node-role.kubernetes.io/master:NoSchedule]
[bootstrap-token] Using token: 39w134.5w0n8s3ktz63rv47
[bootstrap-token] Configuring bootstrap tokens, cluster-info ConfigMap, RBAC Roles
[bootstrap-token] configured RBAC rules to allow Node Bootstrap tokens to get nodes
[bootstrap-token] configured RBAC rules to allow Node Bootstrap tokens to post CSRs in order for nodes to get long term certificate credentials
[bootstrap-token] configured RBAC rules to allow the csrapprover controller automatically approve CSRs from a Node Bootstrap Token
[bootstrap-token] configured RBAC rules to allow certificate rotation for all node client certificates in the cluster
[bootstrap-token] Creating the "cluster-info" ConfigMap in the "kube-public" namespace
[kubelet-finalize] Updating "/etc/kubernetes/kubelet.conf" to point to a rotatable kubelet client certificate and key
[addons] Applied essential addon: CoreDNS
[addons] Applied essential addon: kube-proxy

Your Kubernetes control-plane has initialized successfully!

To start using your cluster, you need to run the following as a regular user:

mkdir -p $HOME/.kube
sudo cp -i /etc/kubernetes/admin.conf $HOME/.kube/config
sudo chown $(id -u):$(id -g) $HOME/.kube/config

Alternatively, if you are the root user, you can run:

export KUBECONFIG=/etc/kubernetes/admin.conf

You should now deploy a pod network to the cluster.
Run "kubectl apply -f [podnetwork].yaml" with one of the options listed at:
https://kubernetes.io/docs/concepts/cluster-administration/addons/

You can now join any number of the control-plane node running the following command on each as root:

kubeadm join 192.168.0.150:6443 --token REDACTED \
        --discovery-token-ca-cert-hash sha256:REDACTED \
        --control-plane --certificate-key REDACTED

Please note that the certificate-key gives access to cluster sensitive data, keep it secret!
As a safeguard, uploaded-certs will be deleted in two hours; If necessary, you can use
"kubeadm init phase upload-certs --upload-certs" to reload certs afterward.

Then you can join any number of worker nodes by running the following on each as root:

kubeadm join 192.168.0.150:6443 --token REDACTED \
        --discovery-token-ca-cert-hash sha256:REDACTED
The
tokenhas a TTL of 24 hours and the uploded certs will be deleted in two hours. So, if the other nodes are to be joined later than that, we need to re-generate the token and upload the certs again.a. First, check if tokens are available
sudo kubeadm token listIf nothing is shown, proceed with generatiung the token. Else, we can use the token which has a usage of
authentication,signingsudo kubeadm token createb. If during
kubeadm join, any certificate errors come up, re-upload the certificates usingsudo kubeadm init phase upload-certs --upload-certs -
(OTHER MASTER ONLY) If you want to add additional control plane nodes, you can use the
kubeadm joincommand:KUBE_VERSION=$(sudo kubeadm version -o short)Then, join the cluster
sudo kubeadm join 192.168.0.150:6443 --token REDACTED --discovery-token-ca-cert-hash sha256:REDACTED --control-plane --certificate-key feb5064c88b7e3a154b5deb1d6fb379036e7a4b76862fcf08c742db7031624d9The output should look something like this:
[preflight] Running pre-flight checks [WARNING SystemVerification]: missing optional cgroups: hugetlb [preflight] Reading configuration from the cluster... [preflight] FYI: You can look at this config file with 'kubectl -n kube-system get cm kubeadm-config -o yaml' [preflight] Running pre-flight checks before initializing the new control plane instance [preflight] Pulling images required for setting up a Kubernetes cluster [preflight] This might take a minute or two, depending on the speed of your internet connection [preflight] You can also perform this action in beforehand using 'kubeadm config images pull' [download-certs] Downloading the certificates in Secret "kubeadm-certs" in the "kube-system" Namespace [certs] Using certificateDir folder "/etc/kubernetes/pki" [certs] Generating "front-proxy-client" certificate and key [certs] Generating "etcd/server" certificate and key [certs] etcd/server serving cert is signed for DNS names [clstr-01-cp-03 localhost] and IPs [192.168.0.52 127.0.0.1 ::1] [certs] Generating "etcd/peer" certificate and key [certs] etcd/peer serving cert is signed for DNS names [clstr-01-cp-03 localhost] and IPs [192.168.0.52 127.0.0.1 ::1] [certs] Generating "etcd/healthcheck-client" certificate and key [certs] Generating "apiserver-etcd-client" certificate and key [certs] Generating "apiserver" certificate and key [certs] apiserver serving cert is signed for DNS names [clstr-01-cp-03 kubernetes kubernetes.default kubernetes.default.svc kubernetes.default.svc.cluster.local] and IPs [10.96.0.1 192.168.0.52 192.168.0.150] [certs] Generating "apiserver-kubelet-client" certificate and key [certs] Valid certificates and keys now exist in "/etc/kubernetes/pki" [certs] Using the existing "sa" key [kubeconfig] Generating kubeconfig files [kubeconfig] Using kubeconfig folder "/etc/kubernetes" [kubeconfig] Writing "admin.conf" kubeconfig file [kubeconfig] Writing "controller-manager.conf" kubeconfig file [kubeconfig] Writing "scheduler.conf" kubeconfig file [control-plane] Using manifest folder "/etc/kubernetes/manifests" [control-plane] Creating static Pod manifest for "kube-apiserver" [control-plane] Creating static Pod manifest for "kube-controller-manager" [control-plane] Creating static Pod manifest for "kube-scheduler" [check-etcd] Checking that the etcd cluster is healthy [kubelet-start] Writing kubelet configuration to file "/var/lib/kubelet/config.yaml" [kubelet-start] Writing kubelet environment file with flags to file "/var/lib/kubelet/kubeadm-flags.env" [kubelet-start] Starting the kubelet [kubelet-start] Waiting for the kubelet to perform the TLS Bootstrap... [etcd] Announced new etcd member joining to the existing etcd cluster [etcd] Creating static Pod manifest for "etcd" [etcd] Waiting for the new etcd member to join the cluster. This can take up to 40s The 'update-status' phase is deprecated and will be removed in a future release. Currently it performs no operation [mark-control-plane] Marking the node clstr-01-cp-03 as control-plane by adding the labels: [node-role.kubernetes.io/master(deprecated) node-role.kubernetes.io/control-plane node.kubernetes.io/exclude-from-external-load-balancers] [mark-control-plane] Marking the node clstr-01-cp-03 as control-plane by adding the taints [node-role.kubernetes.io/master:NoSchedule] This node has joined the cluster and a new control plane instance was created: * Certificate signing request was sent to apiserver and approval was received. * The Kubelet was informed of the new secure connection details. * Control plane (master) label and taint were applied to the new node. * The Kubernetes control plane instances scaled up. * A new etcd member was added to the local/stacked etcd cluster. To start administering your cluster from this node, you need to run the following as a regular user: mkdir -p $HOME/.kube sudo cp -i /etc/kubernetes/admin.conf $HOME/.kube/config sudo chown $(id -u):$(id -g) $HOME/.kube/config Run 'kubectl get nodes' to see this node join the cluster. -
(OTHER MASTER ONLY) Then, perform step 11 on the other master nodes. This is because
kubeadmdoesn't like a non-empty/etc/kubernetes/manifestsfolder. -
(WORKER ONLY) Then, we join the worker nodes into the cluster using
kubeadm join. We need to ensure that the installed kubernetes version is the same as kubeadm. So, first doKUBE_VERSION=$(sudo kubeadm version -o short)Then, join the cluster
sudo kubeadm join 192.168.0.150:6443 --token REDACTED --discovery-token-ca-cert-hash sha256:REDACTEDThe output should look something like this
[preflight] Running pre-flight checks [WARNING SystemVerification]: missing optional cgroups: hugetlb [preflight] Reading configuration from the cluster... [preflight] FYI: You can look at this config file with 'kubectl -n kube-system get cm kubeadm-config -o yaml' [kubelet-start] Writing kubelet configuration to file "/var/lib/kubelet/config.yaml" [kubelet-start] Writing kubelet environment file with flags to file "/var/lib/kubelet/kubeadm-flags.env" [kubelet-start] Starting the kubelet [kubelet-start] Waiting for the kubelet to perform the TLS Bootstrap... This node has joined the cluster: * Certificate signing request was sent to apiserver and a response was received. * The Kubelet was informed of the new secure connection details. Run 'kubectl get nodes' on the control-plane to see this node join the cluster. -
(MASTER ONLY) Next follow the instructions in the above output to create the kubectl config file in the home directory.
mkdir -p $HOME/.kube sudo cp -i /etc/kubernetes/admin.conf $HOME/.kube/config sudo chown $(id -u):$(id -g) $HOME/.kube/config -
(FIRST MASTER ONLY) Next we will deploy the pod network. We are going to use Flannel for this. We are using Flannel 0.15.0 for this. It's always better to anchor the version.
kubectl apply -f https://raw.githubusercontent.com/flannel-io/flannel/v0.15.0/Documentation/kube-flannel.yml -
(WORKER ONLY) Next copy the kubectl config file to the worker nodes. We can't use sudo to copy from the remote system and ubuntu disables the root user. So, we need to copy over the config present in the
$HOME/.kube/configfile.mkdir -p $HOME/.kube scp ubuntu@clstr-01-cp-01:~/.kube/config $HOME/.kube/config
Accessing the Cluster
Now that the cluster is all set up, we can start connecting to it from outside the cluster. We do this by copying the config file from any one of the nodes. Run the following in Powershell.
scp command will result in any existing config file to be overwritten, so ensure you backup that file with the Copy-Item cmdlet as shown below.# Backup any existing config file since the scp will overwrite such file. This will fail if no config file is present
Copy-Item $HOME\.kube\lol $HOME\.kube\config-bk
# We are using the IP directly as the hostname is not configured in the Windows system
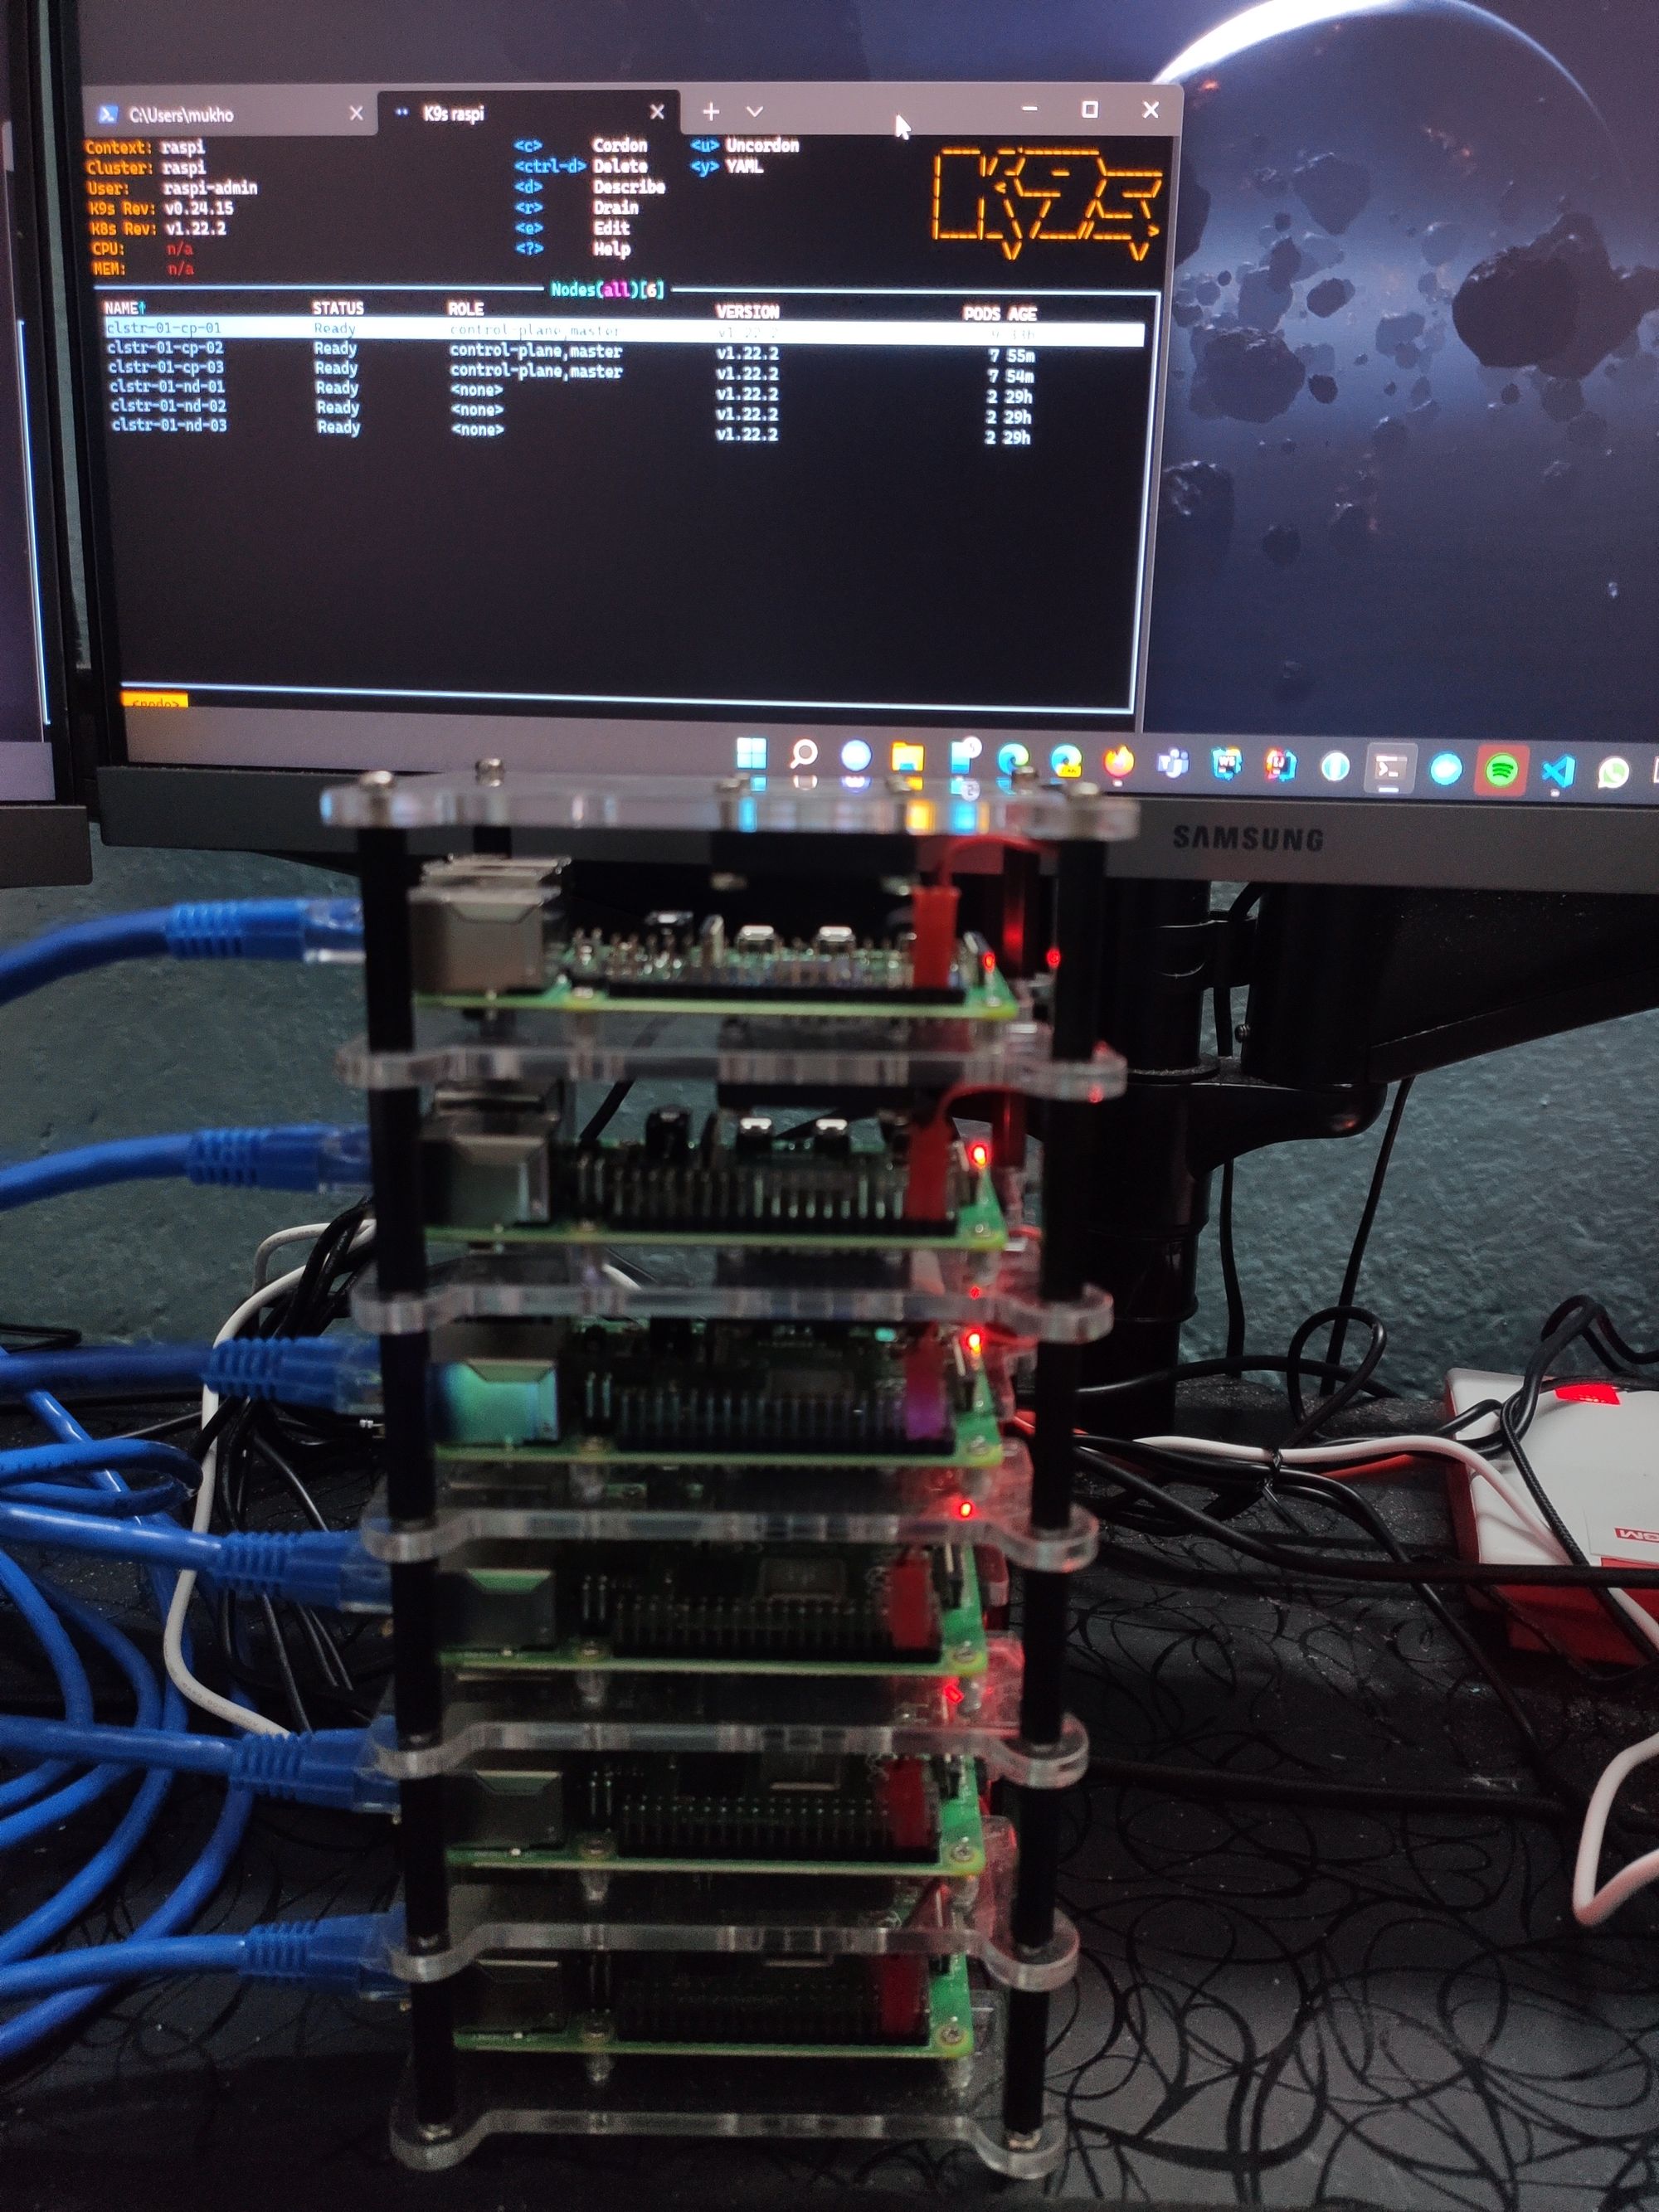
scp ubuntu@192.168.0.50:~/.kube/config $HOME\.kube\configNow open a terminal and run kubectl get nodes. This should fetch all 6 nodes as follows.
NAME             STATUS   ROLES                  AGE    VERSION
clstr-01-cp-01   Ready    control-plane,master   224d   v1.22.2
clstr-01-cp-02   Ready    control-plane,master   222d   v1.22.2
clstr-01-cp-03   Ready    control-plane,master   222d   v1.22.2
clstr-01-nd-01   Ready    <none>                 224d   v1.22.2
clstr-01-nd-02   Ready    <none>                 224d   v1.22.2
clstr-01-nd-03   Ready    <none>                 224d   v1.22.2
That's all folks!
And with that, you have a fully functional Kubernetes cluster ready to roll. There are some other challenges like persistent volumes but that's a blog post for another day.
If you have any questions or have spotted a mistake, feel free to tweet me.